


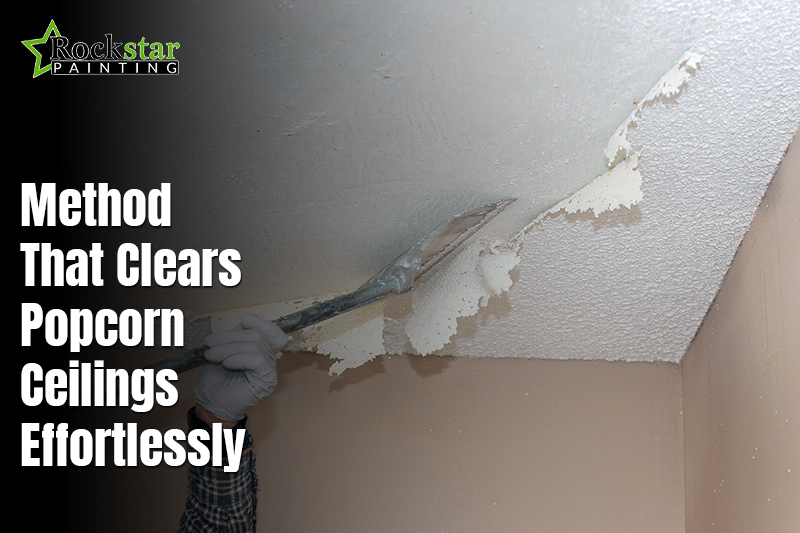
Popcorn ceilings had their moment. Now they make rooms feel dull and closed in. The rough surface holds dust and stains. Many clients ask how to remove popcorn ceiling without stress. The job looks simple at first. Yet it can turn messy fast. You may face falling debris and uneven spots. That is where smart popcorn ceiling removal makes a real difference. A clear plan saves time and keeps your space in control.
So, how do you remove popcorn ceiling the right way? This guide walks you through it step by step. You will learn DIY popcorn ceiling techniques that work. We will explain safe popcorn ceiling scraping and prep steps. You will also see effective ceiling texture removal methods used by pros. By the end, you will know which path fits your home best.
Understanding Popcorn Ceilings

What Popcorn Ceilings Are
Popcorn ceilings are thick spray textures added over drywall. Builders used them to cover cracks and joint marks fast. I have worked in many homes with this finish. It saved time and lowered labor costs. Back then, it looked modern and neat. Today, it feels rough and outdated. The surface grabs dust and stains with ease. That is why many homeowners plan popcorn ceiling removal during remodel work. A smooth ceiling feels fresh and simple.
Materials And Safety Concerns
Older ceilings may contain asbestos. This was common before safety rules changed. When scraped, it can release fine dust. Before you ask how to remove popcorn ceiling, test the surface first. Asbestos ceiling testing I always advise clients to check before starting. A small lab sample gives clear answers. Safe ceiling texture removal begins with that step. If you plan to remove the popcorn ceiling, do not skip testing. Wear a proper mask and seal the room well. If asbestos is present, hire a licensed crew.
How Texture Affects Room Style
Texture shapes the mood of a room. Heavy bumps block light and form shadows. Rooms can look dull and tight. Paint also spreads unevenly on rough areas. Many people notice this once the walls are painted. Clean lines now feel more modern. This trend supports popcorn ceiling removal projects. Smooth ceilings reflect light better, and the space feels open.
Preparation Before Removing a Popcorn Ceiling
Step 1. Clear And Cover The Space
Start popcorn ceiling removal by clearing the room fully. Remove decor and light items first. Move large furniture to the center. Cover everything with thick plastic sheets. Tape plastic along the walls tightly. Lay drop cloths across the full floor. I learned this after one messy job. Dust spreads fast during DIY dust containment methods popcorn ceiling techniques. Good prep saves hours of cleaning later.
Step 2. Check For Asbestos Risk
Now lets see how old the ceiling is. Homes built before the mid-eighties may contain asbestos. I always suggest testing before scraping. A small lab test gives clear answers. If asbestos shows up, stop the project. Call a licensed team for popcorn ceiling removal. This step protects your home and your time.

Step 3. Gather The Right Tools
Keep tools simple and ready. Use a wide scraper for wet texture. A pump sprayer helps loosen the surface. Set up a strong ladder on flat ground. Have trash bags nearby for debris.
Step 4. Protect Yourself During Work
Wear goggles to shield your eyes. Use a quality dust mask. Gloves protect your hands from cuts. Long sleeves keep dust off your skin. Safe habits make DIY popcorn ceiling techniques smoother and calmer.
Tools Required for Popcorn Ceiling Removal
Basic Tools For DIY Popcorn Ceiling Techniques
When I handle ceiling texture removal, I keep tools simple. A spray bottle helps soften the old texture. Light water makes scraping easier and cleaner. A wide putty knife lifts the wet coating. Drop cloths protect floors from falling debris. A hand sander smooths small rough spots after scraping. These basic tools support steady DIY popcorn ceiling techniques. With the right setup, the job feels controlled.
Optional Tools That Save Time
Some tools speed up ceiling texture removal. A long handle ceiling scraper reduces strain on your arms. It helps you reach high areas with better balance. A shop vacuum with a fine filter collects loose dust. Certain scraper heads attach to vacuum hoses. That setup keeps the space cleaner during work.
Safety Equipment You Should Not Skip
Do not skip safety gear during DIY popcorn ceiling techniques. I have watched dust drop straight into bare eyes. Put on clear goggles before you start scraping. Wear a solid dust mask the whole time. Fine dust spreads more quickly than most people think. Pull on gloves to guard your hands from cuts and sore spots. Simple protection makes ceiling texture removal feel much safer. Old clothes keep dust off your skin. Proper safety steps make ceiling texture removal safer and calmer.
Step-by-Step Popcorn Ceiling Removal
Popcorn ceiling removal can look messy at first. I have done this in many homes over the years. The secret is to move slowly and stay calm. This step-by-step popcorn ceiling removal method keeps damage low. Each stage helps with clean ceiling texture removal. Follow the order, and you will avoid common mistakes.

Step One: Soften The Texture
Start popcorn ceiling removal by spraying warm water. Mist a small section and let it sit. The water loosens the old texture layer. Do not soak the drywall underneath. Wait a few minutes before testing it. Soft texture should scrape off with light pressure.
Step Two: Scrape Gently
Use a wide scraper and hold it low. Slide it across the damp surface slowly. Do not force the blade into drywall. I always remind clients that patience matters here. Careful scraping protects the base during ceiling texture removal.
Step Three: Dispose Of Debris Safely
Let the wet material fall on covered floors. Collect it into strong trash bags right away. Seal the bags before moving them outside. Clean space keeps dust under control during popcorn ceiling removal.
Step Four Sand For Smooth Finish
After scraping, check for rough spots. Use a hand sander with light strokes. Move evenly across the surface. Do not press too hard in one area. Smooth sanding improves ceiling texture removal results.
Step Five: Apply Primer And Paint
Wipe away fine dust before painting. Apply one solid coat of primer first. Primer seals the drywall and prepares it well. Once dry, add two light coats of paint. Proper popcorn ceiling removal ends with a clean, smooth look.
DIY Techniques vs Professional Services
Many clients ask how to remove popcorn ceiling on their own. I have seen solid results, and I have seen costly mistakes. Small rooms are often manageable with patience and care. Large areas demand more time and steady effort. Many people underestimate the dust and cleanup involved. If there is any asbestos risk hire a licensed crew right away. Uneven ceilings also need skilled hands for proper repair. For offices and retail sites, professional teams handle popcorn ceiling removal faster and keep the space under control.
| Factor | DIY Popcorn Ceiling Techniques | Professional Popcorn Ceiling Removal |
| Cost | Lower upfront cost | Higher upfront cost |
| Time | Takes longer to finish | Completed faster |
| Mess Level | Can be very messy | Managed with equipment |
| Skill Need | Basic skill required | Skilled crew handles issues |
| Large Areas | Hard to manage | Better for big spaces |
| Asbestos Risk | Not recommended | Safe handling available |
If you run a business space downtime matters. A pro team limits disruption and improves finish quality.
Minimizing Mess During Removal of Popcorn Ceiling
Popcorn ceiling removal can turn chaotic fast if you skip prep. I have seen fine dust travel into nearby rooms. The key is control from the start. Smart planning makes ceiling texture removal cleaner and less stressful. These simple actions help you manage dust and speed up cleanup.
- Hang heavy plastic over walls and lay it across floors before you start.
- Lightly wet the ceiling so dust stays down while you scrape.
- Keep a vacuum close and pick up debris as it falls.
- Tape plastic over door edges to stop dust from drifting out.
- Finish and clean one area at a time instead of leaving it all for later.
When you control debris early, the project feels manageable. Small habits during ceiling texture removal save hours of cleanup later.
Finishing Your Ceiling After Popcorn Ceiling Removal
After popcorn ceiling removal, ceiling primer application the job is not fully done. I have seen many people rush this part. That mistake shows up later under bright light. Clean ceiling texture removal needs proper finishing steps. If you skip them, the surface looks patchy. Let us handle this the right way.
Step One: Sand After Popcorn Ceiling Removal
Start with light sanding across the whole ceiling. Use fine-grit paper and slow, steady strokes. Focus on edges and rough spots. Do not press hard on soft drywall. I always run my hand across the surface to check smoothness. This step improves the final result of popcorn ceiling removal.
Step Two: Prime For Ceiling Texture Removal
Apply one even coat of primer next. Primer seals exposed drywall and old patch marks. Let it dry fully before paint. This step protects the surface long-term. A good primer makes ceiling texture removal look clean and even.
Step Three: Paint For A Modern Finish
Use flat ceiling paint for best results. Roll in one direction with steady motion. Add a second coat after drying. Smooth paint highlights proper popcorn ceiling removal.
Step Four: Maintain The Surface
Dust the ceiling lightly every few months. Fix small cracks early before they spread. Avoid high moisture in the room. Simple care keeps your ceiling texture removal looking fresh.
Common Mistakes To Avoid During Popcorn Ceiling Removal
Do Not Soak The Ceiling Too Much
Many people over soak the surface at the start. I have seen drywall paper peel because of this. Light mist works better than heavy spray. During popcorn ceiling removal, too much water causes damage. Wet only small sections at a time. Smart control makes DIY popcorn ceiling techniques safer and cleaner.
Avoid Damaging The Drywall
Pressing too hard with a scraper leaves deep marks. Those gouges need patchwork later. Keep your blade at a low angle. Let the tool glide across the surface. Slow, steady moves protect the base layer. Careful hands improve popcorn ceiling removal results.
Never Skip Safety And Cleanup
Some skip masks and eye gear to save time. Dust can spread fast and settle everywhere. Always wear proper gear during DIY popcorn ceiling techniques. Bag debris right away and seal it tight. Proper disposal keeps your home clean after popcorn ceiling removal.
Conclusion
Popcorn ceiling removal may seem like a tough project at first. Once you understand the steps, it feels manageable. We covered prep tools, safe scraping, and proper cleanup. You now know when DIY makes sense and when to call a pro. Careful ceiling texture removal protects drywall and improves final results.
If you still wonder how to remove popcorn ceiling the right way, the answer is simple. Plan well, move slow and respect safety steps. Rockstarpainting Testing older ceilings also protects your space. Smooth ceilings reflect light and feel modern. Good popcorn ceiling removal improves room appeal and resale interest. Done right, the finish will last for years.
FAQs
In most homes, popcorn ceiling removal in one average room takes one full day. Prep and drying time often decide the pace. Larger rooms may need extra hours. Careful ceiling texture removal should never feel rushed.
Some thin textures can stay in place. If the pattern is light, you may skim coat over it. I always test a small patch first. Thick texture usually needs full popcorn ceiling removal.
Smooth ceilings reflect light better and feel modern. Buyers often prefer clean flat finishes. While it may not raise prices alone, it supports resale appeal.
What protective gear is essential during ceiling scraping?
Some thin textures can stay in place. If the pattern is light, you may skim coat over it. I always test a small patch first. Thick texture usually needs full popcorn ceiling removal.
Smooth ceilings reflect light better and feel modern. Buyers often prefer clean flat finishes. While it may not raise prices alone, it supports resale appeal.