


Spray Painting Walls Made Simple
Sprayers save time and provide a smooth finish, but they also need careful prep. Imagine walking into a room with fresh, even coats and bright colors. Many readers ask, Is it easy to paint using a sprayer? The answer depends on patience, prep, and steady use of the right steps. Sprayers can speed work, give clean coats, and reduce roller streaks. Still, they need setup and care, and skipping these steps causes weak results.
Roller vs Sprayer Comparison
Rollers work well for some spaces, but sprayers give faster and smoother coats. A roller may leave marks, while a sprayer spreads paint evenly when practiced. Beginners ask if spraying is better, and the answer is yes for big rooms. The key is planning well, preparing with care, and learning sprayer control through practice.
Sprayers require cleaning, setup, and protective work, yet the rewards are worth it. This guide covers tools, prep steps, painting, and cost review. With these notes, spraying becomes simple and less stressful. Readers will see how small changes can decide between a poor and a neat finish.
By the end, you will see that spraying is not hard if you prepare well. You will also learn how sprayers bring pro-level results within reach. Like any skill, success with spraying comes from patience and steady practice.
What is a Paint Sprayer?
Understand the Tool Before You Start
A paint sprayer is a device that turns paint into a fine mist. This mist coats walls evenly and reduces streaks left by rollers. Sprayers come in types, each fit for different projects, like rockstar painting.
Airless Sprayers
Airless sprayers use high pressure to coat large areas quickly. They are best for outside walls and big rooms. For home projects, they fit when covering wide areas where speed matters.
HVLP Sprayers
HVLP sprayers give more control for detail jobs and furniture. They use steady air to cut extra spray and give smooth coats. They are great for trim, cabinets, and smaller spaces where detail counts.
Compressed Air Sprayers
Compressed air sprayers are older types, but still give smooth coats. They need a strong air supply but can handle detail work at home. Some users like them for small jobs where a steady flow matters.
Choosing the right sprayer depends on room size and paint type. Many beginners prefer HVLP sprayers, while others pick airless for quick jobs. Each type works in its own way, and learning them saves time and paint.
Learning how sprayers work helps avoid errors in projects. When spray painting walls, control and steady moves ensure better results. Prep with the right tool is half the work in painting.
Pros and Cons of Using a Paint Sprayer
The Good and The Challenges
Pros:
Faster Coverage
Sprayers give unmatched speed, especially on large, smooth walls. They reduce labor time by covering wide areas quickly. For many, this is why a beginner spray painting guide often highlights sprayers as a smart choice for big jobs.
Smooth Finish
Sprayers make clean coats with fewer marks, leaving walls bright and neat. Beginners asking, should I try spray painting? will see that sprayers give pro-looking results with practice.
Cons:
Cost
Sprayers are more costly than rollers, making them a bigger investment. Buyers must weigh price against time saved and the neat finish gained.
Learning Curve
Control of spray distance and balance takes practice to master. First-time users may struggle, but steady use builds skill and confidence.
Overspray
An extra spray can waste paint if not managed with care. Air flow and safety gear are vital due to the mist that spreads around.
Despite these issues, sprayers offer more benefits than drawbacks. Beginners must weigh speed and finish before choosing. With steady use, issues fade and results improve over time.
Tools & Materials You’ll Need
Get Ready with the Right Gear
Tools:
Sprayer: A sprayer is the main tool for this work. It spreads paint in a fine mist, coating walls smoothly. Sprayers reduce streaks and save time compared to rollers. Regular cleaning keeps them working well and extends their life. Using them correctly makes painting more effective.
Ladders: let you reach high spots safely without strain. They provide needed access to ceilings and tall walls during spraying. Sturdy ladders prevent falls and help keep balance steady. Picking the right height ensures safe work across all room areas. Quality ladders also make the job less tiring.
Tape: Masking tape keeps lines sharp, blocking paint from corners and trim. It prevents extra work by stopping stray spray from reaching unwanted areas. Quality tape sticks firmly yet removes cleanly after spraying. This small step ensures edges look neat and well done. Taking time to tape carefully saves hours later.
Respirator: A respirator protects the lungs from paint mist, making it safer than simple masks. Using one adds comfort and reduces health risks. Good respirators filter fine particles and reduce strong fumes. Wearing one through the project protects your health and makes spraying easier. Strong filters provide confidence and lasting comfort.
Supplies:
Primer: Primer prepares surfaces and gives a strong base so the paint sticks longer. It supports even coverage and a lasting finish. Primed walls resist peeling and give smoother coats. Skipping primer often leads to weak or patchy paint.
Paint Strainers: Paint Strainers remove lumps, ensuring smooth flow through the sprayer. They help avoid clogs and uneven spray. Using strainers reduces waste and improves coat quality. This small supply saves time and prevents repair work later.
Buckets: Buckets are used to mix paint and manage amounts with ease. They keep supplies steady and organized. Large buckets allow for easier mixing and storage during long projects. Keeping them clean prevents dried paint from spoiling future mixes.
Extension Cord: An extension cord gives the needed reach across larger rooms without frequent plug changes. It provides steady power and mobility. Long cords reduce downtime and make movement easy. A sturdy cord prevents loss of power and supports safe spraying.
Every tool and supply has its own role in success. Missing one part reduces quality and adds time. Preparing with complete home painting tools makes spraying easier and results stronger.
Prepping the Space for Spraying
The Secret to a Flawless Finish is Prep
Preparation is the base of every painting job. Clean walls fully by removing dust or old paint for strong adhesion. Sand rough spots to avoid lumps and streaks. These steps show readers how to use a paint sprayer properly from the start.
Covering furniture and floors is vital as the spray spreads beyond walls. Use tape to protect edges and corners from stray paint. Good taping saves hours of cleaning later. Careful prep adds order and supports neat spraying.
Prep takes much of the project time, but the payoff is worth it. Many paint sprayer tips point to prep as the most vital step. Skipping prep causes messy coats, wasted paint, and more effort in the end.
Complete prep makes spraying smoother, easier, and more rewarding. Beginners often fail here, but those who prepare succeed with lasting results. Prepping helps ensure clean coats that stick and look professional.
Pro Tip: Prep Takes 70% of Total Time
Spending time on prep may feel slow, but it saves hours later. Most pro painters note that almost seventy percent of the time goes here. Strong prep builds strong results, showing how to use a paint sprayer properly for success.
Step-by-Step Spray Painting Guide
How to Spray Like a Pro
Step 1: Practice on cardboard to adjust PSI
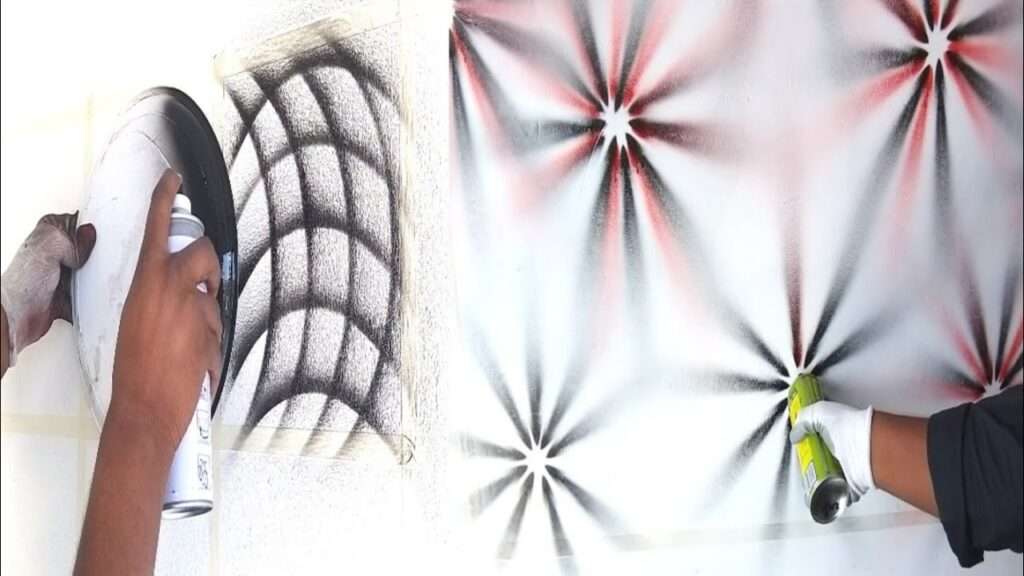
DIY spray painting begins with practice. Use scrap boards to test spray flow. Adjust pressure until you see a fine mist with a smooth spread. Practice teaches control, and extra tests help avoid waste. Cardboard practice builds skill before moving to real walls, reducing the risk of mistakes.
Step 2: Maintain 12–18 inches distance
Hold the sprayer twelve to eighteen inches away. Move steady side to side without sudden stops. Balance ensures smooth coats without streaks. Distance matters because being too close makes drips, and being too far causes weak coats. Practicing this distance creates an even spray that covers well.
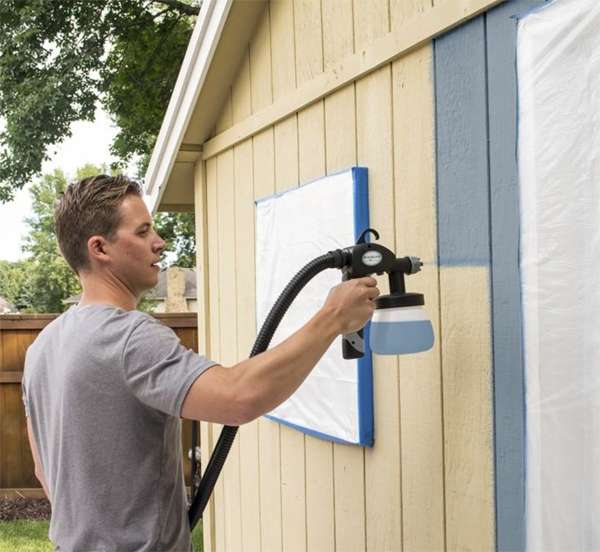
Step 3: Apply thin, overlapping coats
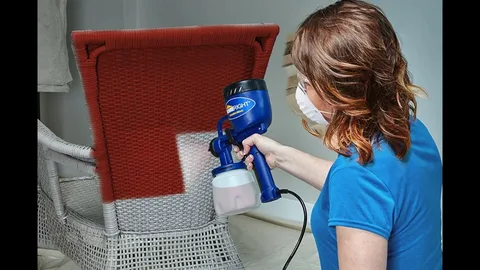
Spray in overlapping lines to avoid missed spots. Thin coats dry quicker and stick better. Many passes give rich color and a lasting finish. Overlap by half for each stroke to ensure a smooth blend. Thin layers also let you fix flaws without heavy buildup.
Step 4: Recoat and cure as needed
Follow the maker’s directions for drying between coats. Curing ensures strength, making the finish resistant to scratches. Patience here gives results worth the wait. Extra time makes paint last longer, and multiple coats improve depth. Strong curing means your finish looks clean for years.
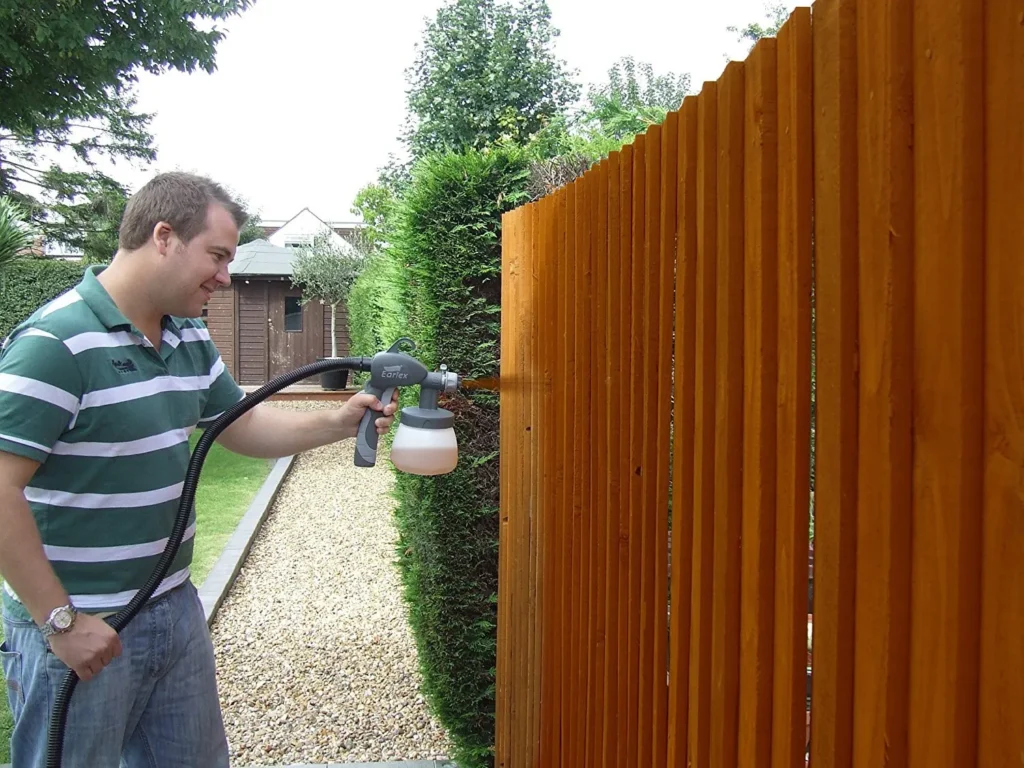
This guide helps readers seeking DIY spray painting tips. Following these points makes the job easier. Spraying becomes clear when broken into smaller, simple steps.
Drying & Post-Painting Care
Ensure a Perfect Finish
Drying time depends on paint type and room heat. Latex paint often dries within an hour, while oil paints may need more time. Always check the maker’s label for guidance. Allowing extra hours avoids weak coats and supports better cure. These notes connect with spray painting techniques since drying is part of the full process.
Curing needs patience beyond surface drying. Walls may feel dry but still hold moisture inside. Waiting longer ensures the finish resists marks and wear. Early use can spoil coats and create repair work. Adding cure time is a key part of lasting success.
Cleaning sprayer parts keeps the tool in good shape. Wash nozzles and tanks with water or mild cleaning solutions. Ignoring this step leads to clogs that stop smooth spraying. Clean gear lasts longer and makes each new project easier. Keeping tools ready ensures strong results on future jobs.
Safety Tips and Best Practices
Protect Yourself While Painting
Ventilation
Air flow is key during spraying. Keep windows open and fans on indoors. Fresh air reduces health risks and helps paint dry smoothly. Poor ventilation traps fumes that cause headaches or worse issues. So always ensure strong air movement.
Protective Gear
Sprayers release mist that spreads into the air. So wearing the right gear is vital. Always use a mask and goggles when spraying inside or outside. Gloves, cover clothes, and firm shoes prevent injuries. These steps protect skin, eyes, and lungs from harm.
OSHA Safety Guidelines
Follow safe steps that align with work standards. Many painting tips point to OSHA advice for safety. Guidelines highlight correct gear, safe air flow, and proper waste handling. Ignoring safety may cause harm that outweighs any benefit, while following rules builds trust and lasting results, especially when ensuring painted kitchen cabinets last longer and maintain their finish.
Mistakes to Avoid
Stop Wasting Paint and Time
Beginners often thin paint too much, making weak and patchy coats. This is a key part of a beginner spray painting guide, since learners often struggle here. Avoid this mistake by following maker notes for thinning ratios and always testing before spraying.
Skipping primer is another common issue leading to peeling and weak coats. Primer builds a base that supports even coats and a lasting finish. Taking this step saves time later and ensures the final look is smooth. Skipping primer is another common issue leading to peeling and weak coats. Primer builds a base that supports even coats and a lasting finish. Taking this step saves time later and ensures the final look is smooth, showing the true importance of primer in residential painting.
Spraying at the wrong angles causes uneven coats. Keep the sprayer steady, flat to the walls, and moving often. Angles matter since poor control creates streaks and leaves marks that are hard to fix.
Choosing the Right Paint Sprayer
Find the Right Tool for Your Project
Choosing between airless and HVLP sprayers depends on budget and project size. Airless sprayers are faster, while HVLP sprayers give more control for detail.
Price matters, so comparing costs helps buyers make better decisions. Below is a clear table that contrasts both sprayers:
| Factor | Airless Sprayer | HVLP Sprayer |
| Speed | Fast, coats large walls | Slower, better for detail |
| Control | Less control, more spray | High control, precise finish |
| Cost | $150–$300 | $100–$200 |
| Finish | Smooth, pro look | Smooth, detail-rich |
Look for easy cleaning, lightweight, and fit with paints. Beginners should look for comfort and ease before picking their sprayer.
This part allows us to target queries for the best paint sprayers. Readers find details about price, features, and choices.
Cost and Time Review
Is a Sprayer Worth the Spend?
Rollers cover two hundred square feet each hour with a fair finish. Sprayers cover four to six hundred square feet each hour.
Rollers cost around fifty to one hundred dollars. Sprayers cost between one fifty to three hundred dollars. The higher cost balances with faster speed and smoother finish.
| Factor | Roller/Brush | Paint Sprayer |
| Coverage | 200 sq ft/hr | 400–600 sq ft/hr |
| Cost | $50–$100 | $150–$300 |
| Finish | Good | Pro-level |
Rollers give a fair finish, while sprayers give pro-level results. For large rooms, sprayers save days of work, making them smart buys.
This review shows the gains while also checking time and cost. It proves sprayers are worth their higher price when matched to project size.
Expert Tips for a Pro Finish
Get a Pro Look at Home
Straining paint stops clogs and makes smooth coats. Many pros never skip this step. Adjusting spray power to match paint type keeps coats even.
Move with steady strokes, overlapping to cover edges without leaving gaps. Keep steady hand moves, avoiding quick stops or starts during spraying.
These notes give more paint sprayer tips that improve results. With patience, even starters can reach finishes close to pros.
Conclusion
Painting with a Sprayer is Easy with Preparation
So, is it easy to paint using a sprayer? Yes, if you plan well and take time. Prep, tool choice, and patience make spraying a clear option for starters and pros.
Sprayers bring speed, smooth coats, and neat results with proper steps. They may seem complex at first, yet practice builds skill fast. Spraying gives ease, speed, and results close to pro finishes.
If you want to improve the quality of painting work, sprayers are worth trying for your next project. They save time, give a strong look, and reduce roller marks. With each pass, walls gain a glow that feels like pro craft.
Get your paint sprayer today or book our expert painting service!
FAQs
Spray Painting Questions Answered
Yes, sprayers cover walls faster than rollers. They spread paint evenly and reduce strain. Rollers are better for edges, but sprayers win in speed.
Sometimes, based on the type and maker notes. Thinning paint helps sprayers work well. Test first to avoid weak coats or uneven finish.
Yes, if air and gear are used. Open windows, wear masks, and goggles. Protect furniture since mist spreads beyond walls.
Keep a steady pace, hold the sprayer twelve inches away. Apply thin overlapping coats for balance. Practice strokes on boards before walls for DIY spray painting control.
Latex dries in about one hour, oil takes longer. Conditions may change timing. Wait before touching walls to keep finishing strong, using learned paint sprayer tips.
These notes fit with DIY spray painting and also apply many useful paint sprayer tips. Adding common queries adds worth and gives clear answers.