


A screw hole that used to hold a shelf bracket firmly can turn into a frustrating problem once it starts spinning loose, tearing further with every attempt to tighten it, or growing too wide to grip anything at all. When that happens, most people reach for the nearest tube of filler and assume the job is done, but learning how to repair screw holes in drywall for reuse properly takes a bit more than smearing compound over the opening and hoping for the best.
Simply filling a hole rarely makes it strong enough to hold another screw, especially once an anchor or a heavier fixture comes back into the picture. A hole that looks smooth on the surface can still be sitting on crumbled gypsum underneath, which is exactly why this guide walks through assessing the actual damage, choosing a repair material suited to the load involved, rebuilding the opening correctly, and figuring out when reuse is genuinely safe versus when it’s time to move the screw somewhere else.
Why Drywall Screw Holes Lose Their Holding Strength
A screw hole rarely fails all at once. Most of the time, the surrounding drywall has already been weakened by something specific, whether that’s repeated use, an oversized opening, or a load the material was never meant to carry. Understanding the actual cause behind repairing damaged drywall holes helps determine which repair method will hold up, rather than guessing and hoping the same problem doesn’t return. Fixing stripped drywall screw holes, in particular, calls for a different approach than simply patching a clean, unused opening.
How Repeated Screws Damage the Drywall Paper
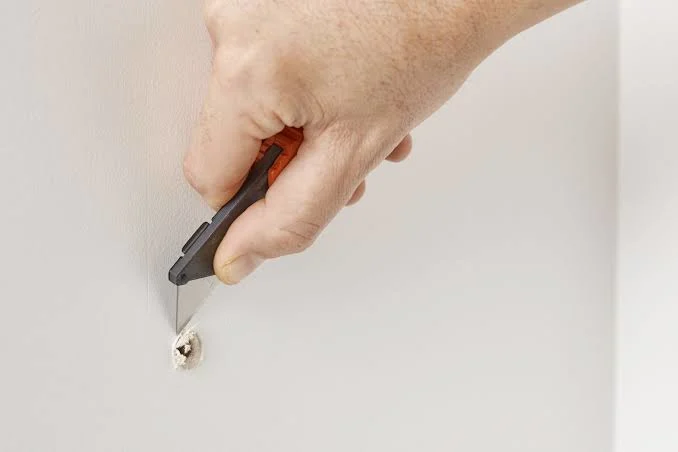
Every time a screw is driven in and backed out again, it tears at the paper facing and compresses the gypsum core slightly more than the time before. The visible hole might still look small and tidy, but the material immediately around it can already be significantly weaker than it appears from the surface.
Why Oversized Holes Stop Holding New Screws
Once an opening has stretched beyond its original size, there’s simply less solid material left for a screw to bite into, and an anchor may no longer be able to expand the way it’s designed to. This is usually the point where a decision needs to be made between filling the hole as-is or reinforcing it before anything else goes back in.
How Heavy Loads Can Widen Existing Holes
It isn’t always the weight of an item that causes the real damage. The constant leverage from a swinging curtain rod, a shelf that gets bumped repeatedly, or a fixture that shifts slightly every time it’s used can gradually enlarge a screw hole far more than its static weight alone would suggest.
When a Stripped Hole Signals Deeper Damage
Torn paper, crushed gypsum, or a screw that keeps loosening no matter how many times it’s tightened are all signs that the damage goes beyond what a thin layer of surface filler can fix. Recognizing this early prevents wasted effort on a repair that was never going to hold in the first place.
How to Assess a Drywall Hole Before Reusing It
Before reaching for any filler, it helps to take a genuine look at what’s actually happening around the hole rather than assuming a quick patch will solve the problem. Hole size, the condition of the surrounding material, and the weight of whatever is being remounted all factor into whether an old screw hole can be reused safely or whether it needs a different approach entirely.
Check the Hole and Surrounding Drywall First
Run a finger around the edges of the opening and check for looseness, cracking, crumbling gypsum, or torn paper extending beyond the visible hole. A clean, small opening in otherwise firm drywall is a very different repair than one surrounded by soft or damaged material.
Match the Repair to the Intended Load
A small picture frame and a heavy curtain rod have no business receiving the same repair treatment, even if the holes look identical. Whenever the replacement screw needs to carry real weight, reinforcement becomes worth considering rather than optional, since a light cosmetic patch was never built to handle that kind of load.
How to Prepare Damaged Drywall Holes for Repair
Preparation is where a lot of repairs quietly go wrong, since applying compound over an unprepared hole rarely produces a result that holds up once a screw goes back in. Taking a few extra minutes to clear out old hardware, remove weak material, and clean the surface makes a noticeable difference in how well the finished patch performs, which is really what preparing drywall holes for new screws comes down to.
Remove Any Loose Anchor or Fastener Material
Old anchors and damaged fasteners should come out before any repair material goes in, though stubborn ones are often better pushed gently into the wall cavity than yanked out forcefully, since aggressive removal can enlarge the hole unnecessarily.
Clear Away Crumbling Drywall Around the Hole
Any material that’s soft, crumbling, or barely hanging on should be cleared away rather than left in place. A clean, stable edge gives the repair compound something solid to bond to, which noticeably improves how well the finished patch holds up.
Smooth and Clean the Repair Surface
A light pass of sanding followed by wiping away dust helps the repair material adhere properly, but it’s worth being careful not to oversand and strip away drywall paper that’s still perfectly intact around the damaged area.
Mark the Original Mounting Position Clearly
Marking exactly where the new screw needs to go before applying any filler helps prevent the eventual hole from drifting slightly off target once the repair has cured. Getting this position right beforehand saves a second repair down the road.
Which Fillers Work Best for Reusable Screw Holes
Not every filler is built to do the same job. Lightweight spackle creates a smooth, cosmetic surface perfectly well, but it isn’t designed to hold real structural load, while other compounds are formulated specifically to rebuild strength into a damaged area rather than just cover it up. Answering the best way to fill drywall screw holes really depends on the size of the opening, how much strength the repair actually needs, and what kind of hardware will eventually go back into it.
| Repair Material | Best Use | Strength Consideration | Reuse Potential |
| Lightweight Spackle | Very small cosmetic holes | Limited structural strength | Low for loaded screws |
| Standard Joint Compound | General drywall repair | Good for surface restoration | Limited without reinforcement |
| Setting-Type Compound | Rebuilding small damaged areas | Firmer repair when properly applied | Better for suitable light-duty reuse |
| Mesh + Compound | Larger damaged openings | Adds repair-area reinforcement | Useful after proper curing |
| Backing/Reinforcement | Heavier mounting needs | Provides stronger support | Best when substantial load is expected |
How to Repair Small Drywall Screw Holes Correctly
When the surrounding drywall is still sound, small drywall hole repair is usually a straightforward process that doesn’t require anything beyond a basic filler and a little patience while it cures.
Fill and Smooth the Damaged Screw Opening
Press the chosen compound firmly into the opening rather than simply smearing a thin layer across the surface, since an unsupported top layer tends to crack or cave in once weight is applied. Feathering the edges out into the surrounding wall helps the repair blend smoothly once it’s dry and sanded.
Cure, Sand, and Inspect the Repaired Area
Filling drywall screw holes only works if the compound is allowed to fully firm up before sanding or drilling begins. Drying time isn’t fixed. It shifts based on the specific product used, how deep the repair is, and the temperature and humidity in the room, so checking firmness before moving forward matters more than watching the clock.
How to Restore Stripped Drywall Holes for Reuse
A stripped hole needs more than a quick surface patch, since the underlying material has usually lost enough integrity that a screw won’t hold reliably without some kind of rebuild.
Fill the Hole Deeply Instead of Skimming Its Surface
Repair material needs to actually occupy the damaged space rather than just covering the face of the wall. Strengthening repaired drywall screw holes means rebuilding depth and substance into the opening, not just hiding it behind a thin cosmetic layer.
Use Reinforcement When the Opening Is Larger
For openings that have grown noticeably beyond their original size, mesh or another reinforcing material helps stabilize the broader damaged area before new compound goes over it, which becomes especially important with larger anchor or screw damage that a simple filler can’t support.

Add Backing When the New Screw Needs More Strength
Adding backing material behind the repaired area, such as a scrap piece of wood or a mounting plate, can create meaningfully more strength than repaired gypsum offers on its own, particularly for fixtures that need to carry real weight going forward.
Relocate the Screw When Repair Strength Is Uncertain
If there’s real doubt about whether the repaired area can hold up, shifting the mounting point over to intact drywall or a nearby stud is often the more reliable choice than repeatedly fixing the same weakened spot and hoping the outcome changes.
How to Strengthen Repaired Drywall Holes for Screws
A repaired hole can look completely smooth and still not be ready for a screw, particularly when the load involved is more than a lightweight picture frame. Reinforcement, anchor choice, screw size, and the actual condition of the surrounding wall all play into whether the repair is genuinely strong enough, and a surface that looks perfect doesn’t automatically mean it’s structurally sound underneath. For more extensive damage that goes beyond a single hole, bringing in residential painting services alongside a repair contractor is often more practical than tackling widespread wall damage alone.
A few things worth checking before trusting a repaired hole with real weight:
- Confirm the compound has cured completely, not just dried on the surface.
- Choose an anchor rated for the fixture’s actual weight, not just the hole’s size.
- Avoid oversized screws that can crack a freshly repaired patch.
- Test the mounting point with light pressure before hanging full weight.
- Consider backing or a stud mount for anything heavier than typical wall decor.
When a Drywall Hole Needs More Than Simple Filler
Some damaged holes are simply too far gone for ordinary filler to solve on its own. Large openings, drywall that’s crumbled well beyond the original hole, mounting points that have already failed more than once, heavier fixtures, and locations that genuinely need structural support all point toward a bigger repair than a quick patch job.
In many of these cases, repairing drywall without replacing the entire panel is still realistic, but it usually means cutting out a larger localized section and patching it properly rather than trying to stretch a small amount of filler across a problem it was never meant to solve. Once that kind of patch has been painted and blended in, many homeowners bring in an interior painting company to make sure the repair disappears into the rest of the wall rather than standing out as an obvious fix.
How to Drill a Repaired Drywall Hole Without Damage
Once the repaired area has fully cured, creating the new opening correctly matters just as much as the repair itself did. Rushing this step, or drilling before the compound has genuinely hardened, can undo all the careful work that went into rebuilding the hole in the first place.
- Confirm the repair is completely firm by pressing on it, not just checking that it looks dry.
- Mark the exact position using the reference point noted during preparation
- Choose a drill bit sized appropriately for the anchor or screw being used.
- Drill slowly and steadily rather than forcing the bit through quickly.
- Stop as soon as the hole reaches the needed depth to avoid unnecessary enlargement.
Which Mounting Method Best Fits the Repaired Hole
The right way to finish a repair depends heavily on both the condition of the drywall and how much weight the final mounting point actually needs to support, a consideration that comes up in homes across our service area regardless of the type of fixture involved.
Choose Direct Screws Only for Suitable Support
A direct screw works fine for light items on drywall that’s genuinely solid after repair, but it’s a mistake to assume every repaired hole can automatically handle an ordinary screw without any additional support behind it.
Use Anchors or Framing for Greater Holding Power
Load-spreading anchors or a direct connection to framing generally provide noticeably better support than a screw alone, and the right choice ultimately comes down to matching the fixture’s weight against the actual condition of the repaired drywall.
How to Prevent New Damage Around Reused Screw Holes
A few consistent habits go a long way toward keeping a freshly repaired hole from failing again once a fixture is back in place.
- Avoid removing and reinstalling the same screw repeatedly once it’s secured.
- Use hardware sized correctly for the hole and the anchor being installed.
- Stop tightening once the screw is snug rather than forcing it further.
- Respect the weight limits of whatever anchor or mounting method was chosen.
- Check the area periodically for early signs of movement or loosening.
Common Mistakes That Weaken Repaired Drywall Holes

A handful of avoidable mistakes account for most repaired holes that end up failing again shortly after the work is finished. Drilling into a patch before it’s fully cured is one of the most common, since compounds that feel dry on the surface can still be soft underneath. Applying filler only to the visible face of the hole rather than filling it with any real depth is another, since it leaves the structural problem essentially untouched behind a cosmetic layer. Choosing the wrong material for the situation, whether that means using a lightweight spackle where a setting-type compound was needed or skipping reinforcement on a larger opening, tends to produce a repair that looks fine initially but doesn’t hold up under actual use.
Overloading a freshly repaired point before it’s had time to prove itself, and repeatedly relying on the same weakened location instead of relocating the screw when the repair strength is uncertain, round out the mistakes worth watching for. Correcting each of these usually comes down to slowing down, matching the repair material to the actual damage, and giving the compound the time it genuinely needs before trusting it with weight.
How Long Should a Repaired Drywall Hole Fully Cure
There’s no single drying time that applies to every drywall repair, since curing depends on the specific product used, how deep the repair goes, and the humidity, temperature, and ventilation in the room at the time. A thin cosmetic patch in a well-ventilated space might firm up fairly quickly, while a deeper repair in a humid bathroom or a poorly ventilated room, the kind common in older Denver-area homes, can take noticeably longer to reach full strength. Rather than relying on a fixed number of hours, the more reliable approach is pressing gently on the repaired area and confirming it feels firm and consistent all the way through before drilling or loading it with any weight.
Final Thoughts on Reusing Repaired Drywall Screw Holes
Successfully repairing screw holes in drywall for reuse comes down to rebuilding the damaged area properly rather than simply covering it up and hoping for the best. Assessing how bad the damage actually is, choosing a repair material that matches the load involved, giving the compound the time it needs to fully cure, and selecting a final fastener suited to the fixture all play a role in whether the repair actually holds. For larger or more noticeable drywall damage, Rockstar Painting can help restore the surface properly before the repaired area is used again.
Some holes, particularly those that have failed repeatedly or need to support something heavy, are better served by reinforcement or relocation than by another round of filler in the same weakened spot. Taking the time to repair a screw hole correctly before putting a fixture back in place saves the frustration of doing the same job twice, and it’s worth handling properly the first time rather than rushing back to hang something the moment the compound looks dry.
FAQs About Repairing Drywall Screw Holes for Reuse
Not every repaired drywall hole ends up with the same holding capacity, since the outcome depends heavily on the size of the original damage and the method used to fix it. The questions below cover some of the most common concerns people run into when trying to reuse a screw hole after repairing it.
Often, yes, as long as the surrounding drywall was properly prepared, filled with a suitable material, and given enough time to fully cure before a new screw goes in.
Setting-type compound generally holds up better than lightweight spackle for anything beyond a very small cosmetic hole, and adding mesh reinforcement helps further for larger or more damaged openings.
Fill the hole deeply rather than just skimming the surface, add reinforcement if the opening is large, and consider backing material if the fixture being remounted will carry real weight.
Reinforcement makes sense whenever the hole has grown significantly larger than its original size, the surrounding drywall feels crumbly or unstable, or the fixture going back in needs to support meaningful weight.
There’s no fixed timeframe, since it depends on the product, the depth of the repair, and the room’s humidity and temperature. Checking that the area feels firm all the way through is more reliable than counting hours.