


A wooden deck changes how a home feels. But without proper care, it can fade, crack, or absorb moisture. Many homeowners look for a simple method to protect it and keep it strong for years. That is where the deck-staining process explained becomes important for lasting wood protection and a smooth outdoor finish.
The deck-staining process explained helps people understand each stage from cleaning to the final coat. Many beginners searching for a step-by-step deck staining process explained want clear direction before starting. In one real case, a homeowner skipped proper cleaning, and the stain peeled quickly. Later, proper wood deck staining steps fixed the surface and restored a clean, even finish that lasted longer.
Deck Staining Process Explained for Homeowners
A faded or cracked deck can quickly become unsafe and dull. Many homeowners feel confused about where to start and often make costly mistakes during staining. A clear deck-staining process guide helps avoid uneven color peeling and weak protection that shortens wood life.
Understanding how to stain a deck gives better results and reduces repair costs. Basic wood deck staining steps include cleaning, sanding, and sealing. In one case, a homeowner skipped sanding, which caused a patchy finish. Professional work usually delivers smoother coating, stronger protection, and longer-lasting outdoor surfaces compared to DIY efforts.
Planning Your Deck Surface Before Stain Application
Proper planning helps avoid uneven finishes and wood damage. Careful checks and preparation steps ensure the surface is ready for long-lasting stain results and smooth application. Companies with a commercial painting bussines background often follow detailed preparation procedures to improve coating performance and durability.
Deck Surface Inspection Check
Deck preparation and staining start with checking cracks, loose boards, and moisture damage. In one case, a homeowner found hidden rot that was fixed before staining, preventing future spreading issues.
Cleaning And Safety Preparation
Before starting the deck staining process, the surface must be cleaned of dirt, mold, and old coating. One weathered deck had slippery algae, and cleaning made it safe for further work.
Material And Stain Selection
Choosing the right stain depends on the wood type and weather exposure. In one project, switching to a weather-resistant stain improved durability after the previous coating faded too quickly.
Sanding For Smooth Surface Finish
How to stain a deck properly includes sanding rough spots for even absorption. A rough backyard deck was sanded first, which helped the stain spread evenly without blotchy patches.
Weather Condition Check Before Work
Planning includes checking dry weather for proper drying time. A homeowner once applied stain before rain and had to redo the entire section due to washout damage.
Safety And Work Area Setup Checklist
Clear furniture and secure edges before starting work. This simple step in the deck-staining process helped prevent accidents during a large family home deck project.
Essential Cleaning Methods For Weathered Wood Decks
Old wood decks collect dirt, mold, and loose fibers over time. Proper cleaning methods help restore the surface and prepare it for long-lasting stain application and smoother finishing results.
Cleaning Tools Comparison
The deck-staining process often goes wrong when steps are rushed or skipped. A proper deck staining process needs cleaning, timing, and correct product choice for lasting results. Contractors experienced with decorative wall texture work usually pay close attention to finish consistency and surface appearance, which also benefits deck staining projects.
Pressure washer for deep dirt removal
Scrub brush for tight surface areas
Sanding block for smoothing rough wood
Leaf blower for clearing dry debris
Pre-Sanding vs. Post-Wash Prep
Wood deck staining steps often include both washing and sanding, depending on surface condition. A heavily worn deck was first pressure-washed, then sanded to remove raised fibers. This order improved stain absorption and gave a more even finish.
Deck staining process results vary when sanding is skipped. In one case, post-wash sanding helped fix uneven patches caused by water swelling. Homeowners often ask, “Do I need to sand before staining?” and the answer depends on the wood’s roughness and damage level.
Final Surface Readiness Check
Deck preparation and staining also require checking moisture and dryness before applying the stain. A damp surface can block proper absorption. One homeowner waited an extra day after washing, which helped the stain bond better and last longer under sun exposure.
Choosing the Right Stain Types for Long-Lasting Results
Selecting the right stain is important for strong protection and a clean finish. Different stain types affect durability, color depth, and how well wood handles weather over time. Many homeowners choose professional deck staining services because proper stain selection can extend the life of outdoor wood surfaces.
Transparent Stain For Natural Wood Look
A deck staining guide often explains that transparent stains show natural wood grain. They work best for newer decks in good condition. In one home, a lightly used patio deck kept its fresh wood look but needed faster reapplication due to sun exposure.
Semi-Transparent Stain For Balanced Protection
How to stain a deck often includes semi-transparent options for moderate protection. It shows grain while adding color strength. A suburban deck with mixed sun and shade used this type and stayed protected through seasonal changes.

Solid Stain For Maximum Coverage And Durability
Deck staining process choices often include solid stains for old or weathered wood. It covers imperfections and offers strong protection. In one case, an aging deck with cracks was restored visually using a solid stain for a smoother appearance.
Stain Selection Based On Wood Age And Condition
Older wood needs stronger coverage, while new wood needs a lighter finish. A worn deck with fading boards benefited from solid stain, while newer sections performed better with a semi-transparent coating for a balanced look.
Climate-Based Stain Selection Tip
Hot, sunny areas require UV-resistant stain, while humid regions need moisture protection. A coastal deck used a stronger seal type to prevent water damage and reduce fading from constant weather exposure.
Step-by-Step Deck Staining Workflow And Prep Stages
A clear workflow helps ensure smooth deck staining from start to finish. Each step supports proper planning, safety checks, and correct application for lasting wood protection and an even surface finish.
Step 1: Submission Of The Request
The process begins when the homeowner shares project details and deck condition. In one case, a family submitted photos of a weathered deck, which helped identify early damage before work planning started.
Step 2: Insurance Verification
Safety and liability coverage are checked before work begins. This ensures protection during the job. In one real project, verification helped a homeowner feel secure before allowing work on an older elevated deck.
Step 3: Surface Condition Review
Experts inspect wood condition, moisture, and previous coatings. In one case, hidden mold spots were found under an old stain, which required extra cleaning before moving forward with the staining process.
Step 4: Approval Or Preparation Decision
Based on inspection results, the work plan is approved or adjusted. A homeowner once had to delay staining because rain exposure left the deck too damp for proper application.
Step 5: Final Notification And Scheduling
Once approved, the final schedule is shared with the client. In one real scenario, the homeowner received confirmation and prepared furniture removal before staining began for a smooth workflow.
Applying Stain Evenly for Professional Grade Finish
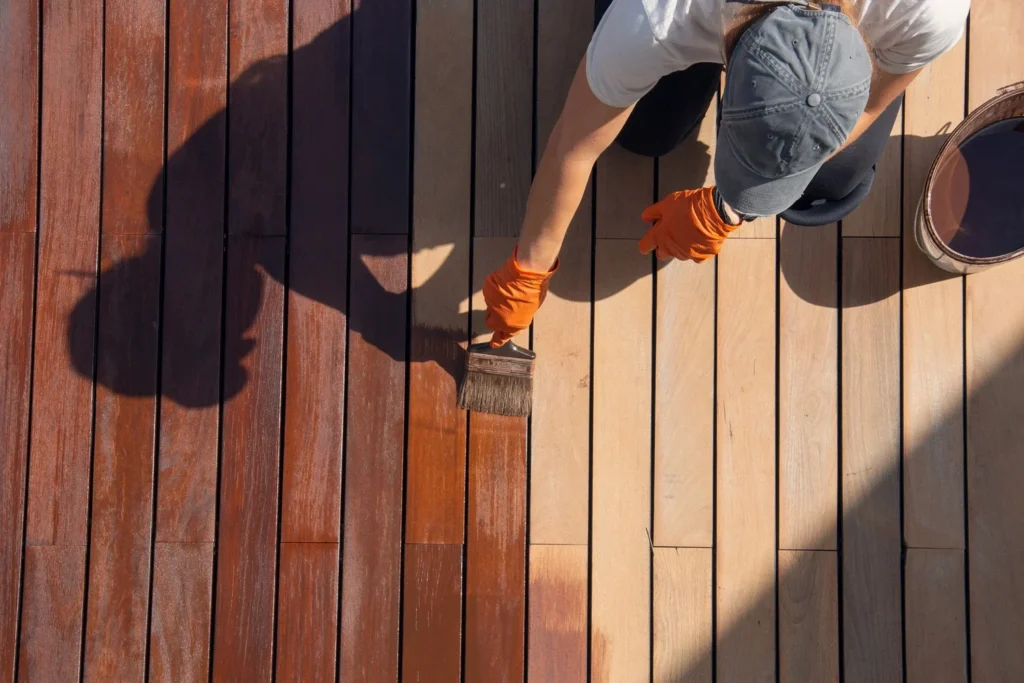
Even stain application is important for a smooth and lasting finish. Many homeowners struggle with streaks and uneven color when they rush the process. A clear deck staining guide helps improve control and consistency during every application step. Professional painting experts often use proven techniques to achieve a uniform finish across the entire deck surface.
Learning how to stain a deck properly reduces common mistakes and improves the final appearance. The deck staining process includes careful application using the right tools and steady hand movement. In one real case, a homeowner created lap marks by stopping mid-section and restarting, which required re-sanding to fix uneven color.
Drying Time Factors That Affect Deck Stain Durability
Drying time plays a key role in how strong and long-lasting a deck finish becomes. Weather conditions and surface type can change results quickly if timing is not managed properly during application.

Weather And Temperature Impact
Hot sunlight speeds drying but can cause uneven curing. Cold weather slows the process and may trap moisture inside wood. In one case, a homeowner applied stain on a cloudy, humid day, and the finish stayed tacky longer than expected.
Humidity And Air Flow Effects
High humidity delays drying and reduces stain bonding strength. Good airflow helps stain settle evenly. A deck staining guide often recommends open-air conditions for best results and stronger surface protection over time.
Sunlight Exposure During Drying
Direct sunlight can dry the top layer too fast, while the inner layers stay wet. This leads to a patchy finish. Wood deck staining steps suggest balanced shade conditions for smoother absorption and even color tone.
Drying Timeline Breakdown
- Light walking: 24 to 48 hours after application
- Light furniture use: 3 to 4 days
- Full curing: 7 to 10 days, depending on the weather
How Long Before Walking On Deck
Most decks allow light foot traffic after one to two days. Walking too early can leave marks or damage the finish. Proper drying ensures long-lasting protection and smooth surface quality.
Common Mistakes During Deck Staining And How to Fix Them
The deck-staining process often goes wrong when steps are rushed or skipped. A proper deck staining process needs cleaning, timing, and correct product choice for lasting results. Small mistakes can affect finish quality and reduce wood protection over time.
Poor Surface Cleaning Before Staining
If deck preparation and staining start on dirty wood, the stain will not bond well. Fix by pressure washing and allowing full drying before reapplying stain for better absorption.
Overapplication of Stain Layers
Too much stain can create sticky patches and an uneven finish. Fix by wiping excess stain with a clean cloth and sanding lightly before applying a thin second coat.
Wrong Stain Type Selection
Using the wrong product affects durability and color. Fix by matching stain type with wood age and condition. Older decks often need a solid stain for better coverage.
Skipping Sanding On Rough Wood
Rough surfaces block smooth absorption during the steps on how to stain a deck. Fix by sanding lightly to remove fibers and improve even stain penetration.
Applying Stain In Wrong Weather
Rain or high humidity can ruin results. Fix by waiting for dry weather with moderate temperatures for proper curing.
Uneven Application Technique
Rushed brushing causes streaks and lap marks. Fix by working in small sections and maintaining a steady direction during application for a smooth finish.
Maintenance Tips After Completing a Deck Staining Job
A good finish lasts longer when the deck is cared for regularly. A simple deck staining guide helps homeowners protect wood from sun, rain, and daily wear. Homeowners who schedule deck maintenance alongside exterior house painting projects often keep their outdoor spaces looking consistent and well maintained.
Seasonal Cleaning And Inspection Routine
Wood deck staining steps include checking the surface every season for cracks, fading, or water spots. In one home, light cleaning after winter helped remove dirt buildup and kept the finish looking fresh without early recoating needs.
Resealing Schedule For Long Protection
Deck preparation and staining do not end after application. Resealing every one to two years keeps protection strong. A homeowner who followed this schedule avoided deep wood damage and saved money on full refinishing work later.
Basic Upkeep Checklist For Homeowners
Sweep debris weekly to avoid moisture buildup
Clean spills quickly to prevent stains
Wash the surface gently every few months
Check boards for cracks or lifting
Reapply protective coat when color fades
Weather Protection And Daily Care
Cover furniture during heavy rain or snow to reduce surface stress. Simple daily care helps maintain even color and extends deck life while reducing long-term maintenance effort and cost.
Final Thoughts On Achieving Perfect Deck Stain Results
A strong finish depends on careful steps from start to end. The deck-staining process shows that cleaning, sanding, and correct application all work together to protect wood and improve outdoor appearance for years.
Following the wood deck staining steps and a simple deck staining guide helps avoid common mistakes and improves durability. Proper preparation and timing make a big difference in final results. For large or weathered decks, professional help can ensure even coverage and long-lasting protection without risk of damage by Rockstar Painting.
Common Questions Homeowners Ask About Deck Staining
The deck staining process explained usually takes one to three days, including cleaning, staining, and drying, depending on weather and wood condition.
A basic deck staining guide includes brushes, rollers, a sprayer, sandpaper, cleaners, and protective gloves for safe and even application results.
Most decks need restaining every two to three years. Sun exposure and rain can shorten this time if protection wears off early.
No, how to stain a deck properly requires a dry surface. Moist wood prevents stain absorption and leads to uneven finish and peeling issues.
Cost depends on deck size, stain type, labor, and preparation work. Older decks with damage usually need more prep time and materials.