


Water leaks in bathrooms result in costly repairs. Mold forms quickly, while damp walls and floors affect the overall structure and weaken it. Many try patching tiles or grout temporarily. These fixes rarely remain more than a few months.
A proper bathroom waterproofing process stops water seepage and protects surfaces effectively. It prevents structural damage, tile lifting, and mold growth. Choosing the right chemical saves time and effort. Understanding bathroom waterproofing cost helps homeowners plan for materials and labor. This guide explains step-by-step waterproofing methods for small and large bathrooms.
You will learn about the best chemicals, how to seal corners, and test for leaks. Both DIY and efficient approaches are included. Reinforcing joints and applying different layers correctly ensures lasting durability.
Following proper steps reduces mold risk and avoids recurring repairs. Maintenance advice keeps your bathroom dry and secure. For more home improvement ideas, also check our detailed guide on how to paint exterior brick walls which covers preparation, priming, and painting techniques.
After reading, you will know how to plan, apply, and maintain waterproofing effectively.
Why Bathroom Waterproofing Matters
Water leaks damage walls, floors, and ceilings. Mold grows in dampen areas, causing allergies. Moisture weakens the structure, and tiles get loose easily. Quick fixes often fail within months. A proper waterproofing method prevents repeated leaks.
Knowing bathroom waterproofing cost helps homeowners budget correctly. Using the right process and knowing how to fix a water leak bathroom. Long-term savings surpass temporary patching solutions.
Proper installation keeps bathrooms safe, clean, and dry. Inspections detect early issues before expensive repairs arise. Investing in full waterproofing simply ensures durability and home value. Small leaks can result in major water damage.
Common Causes of Bathroom Water Leaks
Leaks start from poor and careless construction, cracks, or old grout. Grout failure lets water seep below tiles. Cracks in walls or floors create hidden paths. Improper drainage sends water toward walls, not drains.
Missing or damaged membranes weaken wet zones. Visual signs include stains, wet patches, and mold growth. Corners near shower trays often hide leaks. A proper bathroom leak repair process begins with locating the source.
Early detection prevents structural damage and tile loss. Checking grout lines, joints, and corners identifies seepage points. Regular monitoring avoids costly repairs afterwards. Knowing causes helps prevent regular leaks effectively.
Step‑by‑Step Waterproofing Process
Surface Prep & Cleaning
Remove tiles if needed to access wet areas. Clean floors and walls completely, removing grease and dust. Dry surfaces completely for proper membrane adhesion. Clean surfaces prevent gaps that lead to leaks. Proper prep ensures coatings bond well and last longer.
Cracks, Joints & Seam Sealing
Monitor walls and floors for gaps or cracks. Fill cracks with cement fillers and silicone caulk. Apply joint tape on corners for extra strength. Sealing all joints protects water from seeping under tiles. Carefully consider corners and seams to avoid leaks. Reinforcement at weak points ensures durability during use.
Primer Application
Roll primer on floors and walls up to 180 cm height. Primer improves membrane adhesion and increases coating durability. Allow primer to dry fully before membrane application. A correct primer prevents peeling and weak spots in layers. Proper coverage ensures a strong first barrier against leaks.
First Coat of Waterproof Membrane
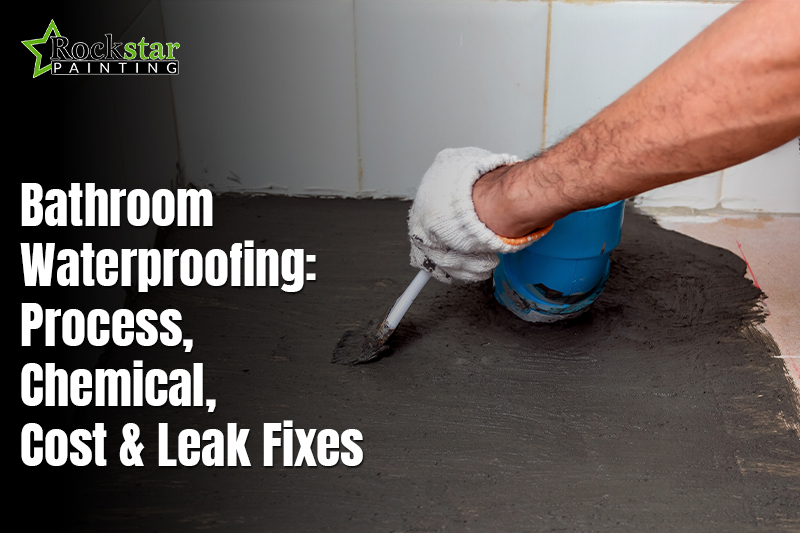
Apply liquid or sheet membrane on floors and walls, 150 mm above the floor. Use a roller to ensure smooth coverage. Ensure the membrane has no holes or gaps. Membranes form the primary barrier to water ingress. Applying properly reduces the risk of structural damage.
Reinforce with Tape or Fabric
Corners and joints are most prone to cracks. Apply reinforcing tape or mesh in these areas. Reinforcement prevents tears during settling or heavy use. Proper reinforcement increases the durability of waterproof layers. Protecting vulnerable spots avoids any prospective leaks and repairs.
Second Coat (Cross-pattern)
Wait for a day or two for the first coat to dry. Apply a second coat in an intersected pattern for a complete seal. Cross-pattern strengthens weak points and prevents water seepage. Proper curing ensures maximum waterproofing efficiency. Double coating reduces the risks of leaks for a longer time.
Flood/Leak Testing
Fill the waterproofed area with shallow water. Observe for leaks over 24 hours. Testing identifies weak spots before finishing tiles. Fix issues immediately to avoid permanent harm. Early detection ensures a fully sealed bathroom.
Protective Plaster & Tile Installation
Apply thin plaster to smooth surfaces. Lay tiles using waterproof grout and sealants. Fill all joints for proper sealing. Finish with proper slope grading to improve drainage. Correct installation prevents water from pooling or seeping.
Best Waterproofing Chemicals & Methods
Cementitious Waterproofing
Affordable, lasting, and simple for DIY or pros. Mix cement with supplements as instructed. Apply on floors and walls up to 180 cm. Creates a hard, lasting barrier against water.
Liquid Membrane Waterproofing
Aquaeous or polyurethane membranes give seamless protection. Easy to apply to uneven walls and floors. Flexible coating adjusts to small cracks and structural movement. Ideal for bathrooms with complex corners or slopes. Prevents water seepage for years when done properly.
Sheet Membranes
Bitumen or PVC sheets protect high-moisture zones. Cut and fit sheets to cover all wet areas. Overlap seams and seal with adhesives. Sheet membranes suit professional installations or large bathrooms. Provides robust long-term protection in heavy-use areas.
Cost-effective DIY Chemical
Some chemicals, like Dr. Fixit (ratio 1:1.5 cement), are cheap and reliable. Homeowners can apply with simple tools. Ideal for small bathrooms without compromising durability. Saves money while ensuring leak-proof surfaces.
Cost Breakdown (DIY vs Professional)
DIY Costs
Kits for 5×6 ft bathrooms cost ₹3,000–₹4,000. Includes chemical, primer, membrane, and basic tools. Labor is free but requires careful work. Homeowners save money but must follow instructions. DIY works for small bathrooms with simple layouts. Proper care ensures lasting results.
Professional Costs
Local professionals charge $200–$500 USD for 50 sq ft. Large projects may cost $1,500–$3,000 USD worldwide. Labor forms most of the cost. Materials influence final pricing. Experts ensure proper curing and complete membrane coverage. Professionals reduce the risk of leaks and future repairs.
Labor vs Materials
Labor varies by skill and region. Materials like primers, membranes, and sealants form 40–50% of the total cost. Correct materials prevent leaks and reduce repair frequency. Investing in quality ensures durable waterproofing success.
Mistakes to Avoid
Skipping primer or curing weakens waterproof layers. Using grout as a barrier fails over time. Partial waterproofing exposes floors or walls to leaks. Non-certified installers or low-quality products cause structural issues. Full coverage prevents recurring water problems.
Inspect corners, joints, and membranes carefully. Avoid rushing or neglecting any stage. Proper planning ensures durable results with fewer repairs. Following instructions protects walls, tiles, and plumbing. Always check chemical ratios and membrane thickness.
Maintenance & Prevention Tips
Modify ventilation through open windows. Maintain slope to avoid water flow near walls. Inspect and reseal grout daily to prevent leaks. Squeegee standing water after each shower session. Reapply sealants every 1–2 years for long protection.
Revamp minor cracks on time to prevent major issues. Keep drains clean to avoid water stagnation. Routine checks extend membrane and tile life. With proper care and smart wall waterproofing, bathrooms stay dry, durable, and mold-free.
Conclusion
A proper bathroom waterproofing process is key to lasting protection. Skipping any step raises leak risks and wall damage. Surface prep, primer, and membrane must be done carefully. Reinforcement ensures floors, walls, and tiles stay strong. Choosing the right chemical matters.
Cementitious coatings are cheap and good for DIY. Liquid membranes give flexible, seamless protection for tricky areas. Professional services cost more but guarantee proper curing. Regular inspections find small cracks or weak joints easily. Ventilation and a correct slope keep moisture from building up.
Reapply sealants and check grout lines often. These steps extend waterproofing life and reduce repairs. Following the full process protects home value. Proper planning, chemical choice, and maintenance prevent leaks. Investing in full waterproofing gives peace of mind. It ensures a safe and long-lasting bathroom.
FAQs
Liquid membrane coatings work best for great protection. DIY options like a doctor. Fixit is reliable and easy to apply in small bathrooms.
The primer and membrane need one to two days to dry completely.
Small bathrooms suit careful DIY with proper instructions. Large projects require expertise to avoid leaks and structural issues.
Leaks often appear at corners or near drains. Invisible leaks behind tiles can worsen if not detected early.